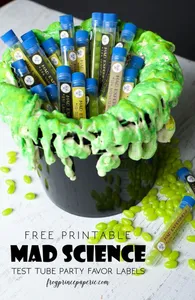
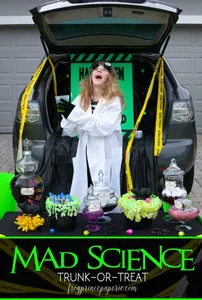
When I put together my Mad Science Trunk-or-Treat trunk, I had to have a candy container that was more than a mere bland bucket. Inspiration struck at the dollar store! I found plain black buckets that would look awesome with a green chemical foam oozing out of the top. Mad (crafty) science here–you know that hard foamy stuff that you spray in cracks to seal them up? Turns out it works great to make drippy goo, too. Read on for how to make Mad Science Bubbling Experiment Buckets of your own…in less than 10 minutes!

Not only are these buckets awesome-looking and only take a few minutes to make, but they’re super inexpensive. Dollar store buckets + a $3 can of spray foam + paint you probably already have = pennywise project.

Mad Science Bubbling Experiment Buckets Materials:
- foam stuff (buy it here)
- black bucket
- green paint
- Squeaky guard rat (optional)
First thing, you’re going to want to put down some paper in a well-ventilated spot to do this project. The foam stuff is a little messy and impossible to get up from the places it lands.
Set up your foam can, then gently spray it onto the bucket. Just remember that the foam doubles in size eventually, so you want to put about half as much as you think you should on the bucket.
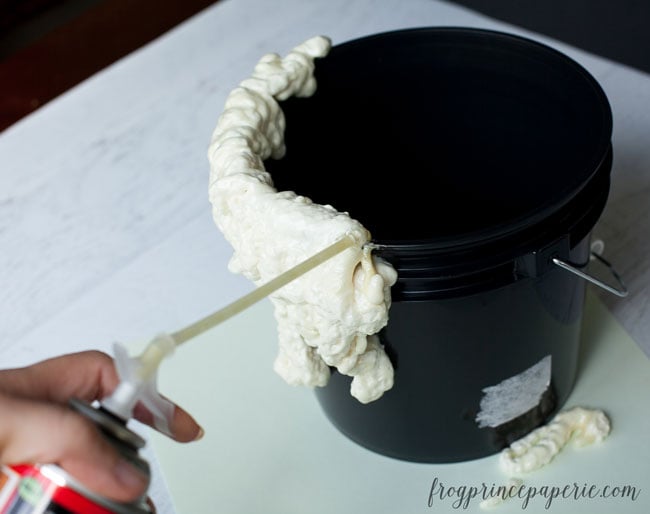
I started at the rim on the inside then sprayed downward in drips all the way around the bucket. Put the drips at different lengths so it looks like something actually did bubble up out of your bucket. Set it aside to dry for at least an hour. I left mine overnight, but the can says it’s set enough at 15 minutes.

Once the foam is all expanded and hard, you can start painting. I used two different colors of green acrylic and just dry brushed the paint over the hard foam all over. It’s not an exact (mad) science, and you don’t need to completely cover the foam…just enough to make it look a little toxic. BTW, the first picture is what happens when you use TOO MUCH foam. My kids said they liked it more, I thought the scaling was a little off, but it was all about making them happy anyway.

After the paint is all dry, fill with candy and add your guard rat. Easy to to Mad Science genius here, and sure to make Halloween treating a little more fun!
If you’re the type that likes live-action instruction, you can watch my YouTube video on how to make these here!
Related Ideas

Paula Biggs
Owner at Frog Prince Paperie
- Pokemon Trunk or Treat Decorations for Halloween
- DIY Thrift Store Steampunk Costumes
- Laundry Room Decor Ideas
- DIY VSCO Girl Shoes with the Cricut EasyPress Mini
- Gift Card Wrapping Idea for Teachers
- Mad Science Lab Trunk-or-Treat Ideas
- 15 Minute Reindeer Food Favor and Free Printable
- {Tutorial} Thanksgiving Turkey Finger Puppets
Mad Science Lab Trunk-or-Treat Ideas - Frog Prince Paperie
Saturday 7th of October 2017
[…] but really, most of them are there for the candy. I made up these overflowing potion buckets (see how to make them here) to put our treats in, and they just scream mad science. The rat is there as our […]
Jess
Thursday 29th of October 2015
This is adorable and quite spooky! Great post, have a nice week :) xo
kristie
Saturday 24th of October 2015
Clever!! Great for Halloween or a party!
Jamie
Friday 23rd of October 2015
Would have never thought to use that for this!! What a great idea. Could even be used for snow in the winter!! Thank you for sharing with us at the #HomeMattersParty
Tiffany
Tuesday 20th of October 2015
This looks great! What a creative idea to use the foam. I can't wait to try it at home! Thanks for sharing with us at the Merry Monday Link Party! Hope to see you again on Sunday night! :0)