
A few years ago we made these DIY tissue paper parrot decorations for a safari party for our little friend Sidney. The paper parrots have been wildly popular on Pinterest, and after many requests, I’ve finally got around do doing a DIY Tissue Paper Parrot Tutorial.

My daughter, Emily, was actually the one to design this project, so thank you again, Emily! It’s a pretty basic project to create: you fluff the pom, cut out the paper parrot parts and then glue everything together.
Cutting out your DIY tissue paper parrot
The only thing that will really slow you down in making this project is cutting out all the little parrot parts if you have to do it with a pair of scissors. After discovering the Cricut Maker, I swear I will do everything in my power not to have to make so many intricate cuts by hand again. The Maker makes life SO MUCH EASIER when it comes to projects like these. My hands cramp far less often, too, LOL! This is a totally UN-sponsored and unsolicited statement, just so you know. I just really love having to skip this paper cutting part of my project work now. For those of you with cutting machines, there is a free parrot template svg file included in the post.
BUT, I do totally understand not wanting to have a cutting machine, or just not having one period. I was one of these people for a very long time and got along just fine. For those who are included in this group without cutting machines, I’m also including a parrot template PDF free printable file for you to make the parrots after a bit of scissor work. It does take longer this way, but it’s a good project to sit in front of the TV and binge watch Netflix and craft with.

DIY Tissue Paper Parrot for Luau Parties
Make a DIY tissue paper parrot that's perfect for luau parties, safari parties and jungle parties with a parrot template. This paper parrot is an inexpensive party decoration--and only takes minutes to put together if you're using a cutting machine like a Cricut!
Materials
- White Cardstock
- Light blue cardstock
- Black cardstock
- Yellow cardstock
- Teal cardstock
- Green cardstock
- Red cardstock
- Red 12-13 inch tissue pom, fluffed
- Gluestick
- Hot glue
- DIY Tissue Paper Parrot SVG file
- -or- DIY Tissue Paper Parrot PDF file
Instructions
- Download the DIY Tissue Paper Parrot SVG file or PDF file.

- If you're using the SVG file, upload the file to your cutting program's design program (Design Space if you're using Cricut products!) and cut the shapes out. They're already color coded and sized for you, so you'll only have to load up your paper and click "Make it!"
- If you're using the DIY Tissue Paper Parrot PDF file, print the paper parrot templates and cut them out onto a stiff paper. A heavy weight cardstock will be fine. Trace the pieces onto your colored card stock and cut them out.

- Once all the pieces are cut, you can begin assembly. Roughly group up your pieces so gluing them together will go more quickly. There are two sides to your tissue paper parrot, so make sure you have them laid out for each side of the parrot; they will be mirrored.

- Run a bit of glue stick over the top of the red part of the wing.

- Lay the yellow wing over the glue and line the pieces up along the top edge as shown in the photo above.

- Run glue stick over the top of the yellow part of the paper parrot wing.

- Lay the green wing over the glue and line the pieces up a as shown in the photo above.

- Glue stick the top of the green part of the wing.

- Lay the teal wing over the glue and line the pieces up along the top edge as shown in the photo above. Your paper parrot wing will be complete at this point. Repeat steps 5-10 for the wing on the other side of the parrot.

- Glue the black beak to the white face of the parrot.

- Glue on the light blue eye and black eyeball to the parrot face.

- Do the same for the mirrored parrot face. One face will go on each side of the parrot head.

- Glue one parrot face on each side of the long neck and head of the parrot.

- Spread apart the fluffed layers to get to the center of the pom. Place the assembled head of the parrot into the center of the pom--you'll need to do this so you can eyeball if the head of the parrot is the appropriate length for the size tissue pom you've chosen. If it's too large, cut off a bit from the bottom of the parrot's neck and eyeball again. Once you've determined that it's the right length, add a bit of hot glue to the base of your parrot's neck. Nestle the hot glued paper into the center of the tissue pom to attach the neck of the parrot.

- Add hot glue to the base of the parrot's tail and insert it on the opposite end of the pom.

- Put hot glue onto the underside of the wing and attach to the side of the pom. You don't have to separate the tissue layers in order to attach. Glue the DIY tissue paper parrot's wing to the opposite side of the pom as well.
Recommended Products
As an Amazon Associate and member of other affiliate programs, I earn from qualifying purchases.


Where to use the DIY Tissue Paper Parrot
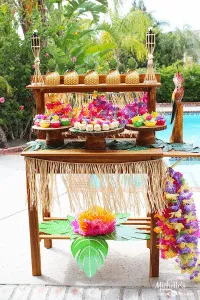
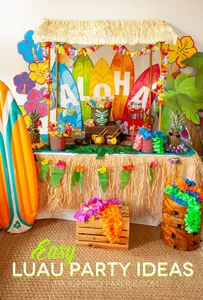
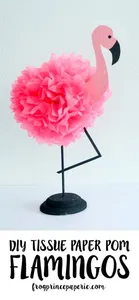
If we’re going to be nit-picky, parrots really belong in the Amazon or the Carribean. All the parrots in Hawaii are ones that got loose as pets. But like flamingos (also not Polynesian), parrots have made their way into all sorts of parties. Luau parties are a big user of parrots as decoration, as are safari parties, jungle parties and pirate parties. And I think it’s just fine. Parrots are quite a colorful accent and look great as decorations! Use them everywhere with abandon!
Related Ideas


Jungle Safari Birthday Party Ideas - Frog Prince Paperie
Thursday 27th of June 2019
[…] My helper that made the animals with party hats also designed some templates for a few tissue paper pom parrots. The parrot is sitting on vines made from twisted brown craft paper and freehand cut leaves. CLICK HERE TO LEARN TO MAKE THIS DIY TISSUE PAPER PARROT. […]