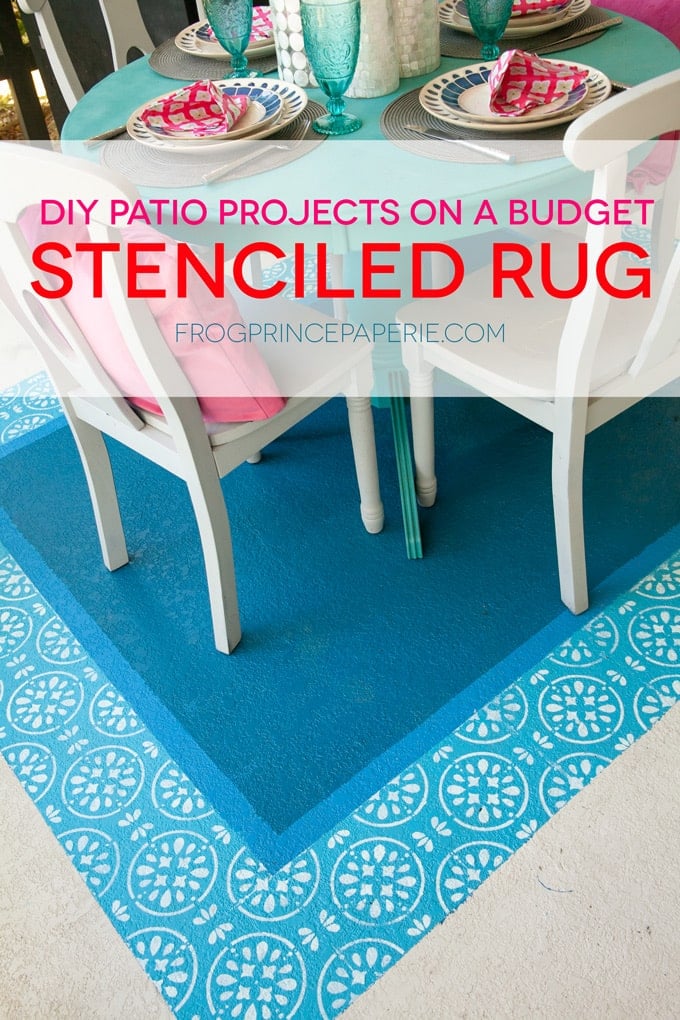
With the warm weather coming, sprucing up the porch is a probably on a lot of minds. But if you’re like me, you need to do a DIY patio on a budget to make it happen. Which is when I decided paint was going to be the major way to renovate my back porch. I’m going to show you one of our projects, a DIY painted stenciled rug using a Cricut Maker that really brightened up our outdoor space!
This post is sponsored by Cricut. All thoughts, feelings and ideas are my own. Affiliate links are included, but cost you nothing and help keep the servers running.
So where did we start?

Obviously, with a clean up, haha. My husband had taken over the porch with his car restoration project, so I had blocked the space from my mind.

The very first project I did, however, was about a year ago when I took my old black table and painted it some updated colors. I’m pretty sad I can’t find a before picture of this anywhere! The black screen you see in the background was a recycling project. The door was an old prop from this backyard movie photoshoot that had been languishing in the garage. It was cut in half, had some hinges added and got another coat of paint. Eventually, I’ll stencil something on it, too. Our air conditioner sits on our back porch, and I love that I have a screen to hide it when we are sitting outside!
As you can see, I was a bit wild and crazy with the spray paint, and took another few sprays at the chair legs after the cardboard protector was removed. A hunt for a rug did happen…it just got moved down the priority list and then forgotten. So when Cricut asked for a project for a DIY porch on a budget, I had the perfect idea–that rug that I wanted, in paint!

Using the Cricut Maker to make stencils for DIY porch projects
Did you know you can use the Cricut Maker and Cricut Explore Air 2 to make stencils? It’s ridiculously easy, and only a matter of finding the right materials to use for the stencil itself. When I’m doing a budget oriented project, I tend to look around my house for things I already have for supplies. I happened to have some foil acetate sheets from Cricut leftover from a favor box project, and it was the perfect weight and substantial enough to be reused a few times. A substitute would be a thin (less than 2mm) plastic, but when I looked around for it it came in such large quantities, I was pretty happy to use the Cricut foil acetate. I mention this again later, but the deep cut blade really works best cutting this material!

On to how to make the rug!

Learn how to create stencils with Cricut to make a painted rug DIY patio project on a budget! When you open up Cricut Design Space, the first thing you're going to want to do is choose an image for your stencil for your DIY patio project. And there are a lot of them! There's a whole grouping of stencils that work well here in Design Space. Before you decide how big the image needs to be, you're going to have to a bit of math. Determine how large your DIY patio rug needs to be. Mine was about 6x8. Your maximum stencil size based on the size of the cutting mat is 11.5 inches. But unless you're painting a giant rug, you'll probably want something smaller; 8-8.5" is a good size. Determine how many you can fit exactly along the length and width of your floor and adjust the image size appropriately. Or adjust the size of your rug. If this doesn't end up working out cleanly in the end, don't worry, you can do some things to make it work visually. I have maybe one new and fully sticky mat at any given time. By the time I was almost done with this project, I finally found one. Which means I had to figure out how to get the acetate to stay completely still while cutting. The trick was using the big scraper to firmly press the plastic to the sticky mat. There's a roller that Cricut makes that would probably work, too, but the scraper I think applied a little more pressure to make a firm adhesion. And after you've peeled up your cut, the scraper is super helpful getting all the stuck acetate off the mat. I tried both the fine point blade and the deep cut blade with this material, and i found that the deep cut blade gave more consistent results. I didn't have to spend a lot of time separating the pieces of the cut further using the deep cut blade, which is always a bonus. Two stencils minimum should be cut for a border rug like the one in these project photos. Things went a bit faster when I had six stencils to tape down in a row, but do what works for you! As with any painting project, you're going to have to suffer a little bit of prep work before you actually start painting. It was delightful to have an excuse to ask my family members to pressure wash the back porch for me before I started, haha. Point is, make sure your surface is really clean before you paint. Any little bits of dirt will make the paint flake off quickly if not cleaned up. We're going to liberally use some painter's tape to make this rug! Measure and tape down the outside area of your rug. Be sure to firmly seal the tape to the floor so no seepage occurs. After the first layer of paint dries, throw down two of your stencils to for guidelines and tape down the inside border of your rug. Paint the base color of your border. Now for the fun part! Painting your stencil! You're going to be tempted to use a regular paintbrush for this...but don't. Go to the craft store or Amazon yourself some stencil brushes for this. They are round with a fat swath of bristles. We won't be doing brush strokes, and dabbing instead so the stencil brushes are much more handy. Start in the corners and work inward with the stencils. Use painter's tape to lightly tape several stencils in a row when making the border of this DIY patio rug. This is so you can get a good transfer of the shapes that are made where the stencils meet. DIPPING THE STENCIL BRUSH: Put a tiny tiny amount of paint on the end of the brush. Like barely any. Use too much paint and it will leak underneath the stencil and make a messy transfer. Like this. This was one of the first panels I painted and I was reaquainting myself with stencils. Lesson learned! Light paint on the brush. APPLYING PAINT WITH THE STENCIL BRUSH: Hold the brush 100% vertically when applying paint. In a dabbing motion, paint the inside of the stencil. Yes, it's time consuming, but you'll get a clean transfer this way. Tiny amount of paint, dabbing motion. NO BRUSHSTROKES. You'll end up with globby shapes. You can lift up the stencils at any point after you paint them to use again. I did find that I ended up with light colored paint in places I didn't want because there was still wet paint on the stencil. With a light coating, it doesn't take the paint that long to dry, so if you find smearing of paint is an issue for you, you may want to wait a few minutes between stencils. When I finished a row of stencils, I always left the last in the line taped down so I could get a nice shape when I taped down the next row. As an Amazon Associate and member of other affiliate programs, I earn from qualifying purchases.
DIY Patio on a Budget : Painted Rug
Materials
Instructions
Creating the Stencil File
 What you're looking for is a repeatable pattern, and one that doesn't have a lot of pieces that connect. Why? Because you'll end up with giant holes instead of nice details. If you question whether or not a design will work, give it a cut on a piece of cardstock first before you use up a piece of acetate.
 Sizing the Stencil image

Prepping the Sticky Mat for Cutting
Cutting the Stencil


Prepping the floor

Measuring and taping
 Paint the base color of your DIY rug. I painted what I thought was going to be navy blue, but it was not really what I wanted, so I later went back and painted my navy as originally intended.
 Painting the stencil


Recommended Products


Shoot me a picture of your accomplishments if you decide to try this out!

Paula Biggs
Owner at Frog Prince Paperie
- How Much is it to paint kitchen cabinets and is it worth it?
- Valentines Day Ideas
- Tips for Successful Holiday Entertaining
- 100 Best Pokemon Party Ideas Ever!
- Chaos Coordinator Shirt and other Mom Shirt Ideas
- Mario Brothers – How to make a Bob-omb DIY
- DIY Hangover Kit
- Squeaky Clean Bachelor Party Ideas with Cricut