This post on mistakes to avoid using Cricut Infusible Ink Pens and Markers is sponsored by Cricut. But I’d write it anyway, because I love this stuff! Affiliate links included.


Why Cricut Infusible Ink?

How to Use Cricut Infusible Ink

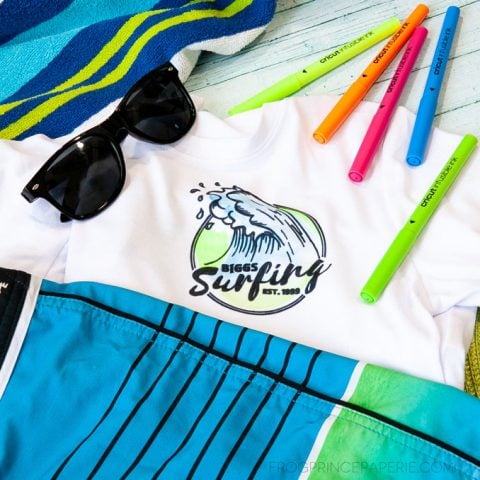
Watercolor Surf Logo T-shirt with Cricut Infusible Ink Pens and Markers
While the initial list of the materials seems lengthy, once you have these items, you can make a ton of project just with the set of pens. Some items are things you will likely have around the house anyway! You REALLY want to follow instructions to the letter with the Infusible Ink projects, there reason for every step in the process.
Materials
- Cricut Infusible Ink Pens, black
- Cricut Infusible Ink Markers in colors of your choice
- Cricut t-shirt blank of choice
- 2 sheets laser copy paper
- White butcher paper, cut to be larger than the plate of your EasyPress
- White card stock
- Cricut heat-resistant tape
- Surf Logo Project file in Cricut Design Space
Tools
- Cricut Maker
- Light mat
- [Cricut Easy Press 2]
- [Cricut Easy Press Mat]
- [Cricut BrightPad] or light box
- Paintbrush
- Pencil
- Scissors
Instructions
Setting up the file
Open up the customizable Surf Logo Project file in Cricut Design Space. This file is set up so you can go in and change the last name on the logo and the year to whatever you like. Although I think it might be pretty cool to see tons of “Biggs Surfing” t-shirts out there, you’ll probably want a different last name on your logo. Size the image to fit whatever size t-shirt you are going to put it on.
Attach all the graphic elements in the space so they will come out all on the same drawing in the correct place. Click “Make.” Mirror the image, first thing! This is still an iron on, so you'll need everything to be backwards on your transfer just like with iron-on vinyl. Select “copy paper” for your material.
Put your laser copy paper onto the light blue mat (or a mat that’s not so sticky—those are best for light weight copy paper.) and feed into your machine. I did use a purple mat for this project, but it's barely sticky enought to keep the paper still.

Put the black Cricut Infusible Ink pen into the holder on the machine. Click the blinking “C.” Watch in wonder as the Cricut Maker draws your image right on the paper!

Filling in your Surf Logo image
You’ll notice that the image is not solid after it is completed. I call this a perfect excuse to hunker down in front of some Netflix and do some coloring. Bonus relaxation time, guys!

The larger your image, of course, the more coloring with the black Cricut Infusible Ink pen you’re going to have to do as the lines get thicker. Shouldn’t take more than 10 minutes for about a 4-inch logo.
Adding Color or Watercolor with Cricut Infusible Ink to your Surf Logo T-shirt
Cricut Infusible Ink markers behave just like regular markers. Which means when you color on plastic, you leave a few bubbles of ink behind. The laser copy paper is pretty porous so it is going to suck up the ink tinged water fairly quickly but this method is a pretty fun way to add color to your project.

Set up your Cricut Brightpad. Directly on top of the glass, place the image that you colored in with your black pen.

Put the second sheet of white copy paper directly over the first. You can tape it down if you need to, but we’re not doing a lot of highly accurate tracing here. When I traced the logo, I pretty much just traced the areas where I knew I wanted to add color. In this case, around the wave, the contrast areas in the circle on top, and the contrast areas in the circle on the bottom.
Now we get to paint! The yellow and green didn’t fare so well when I tried to use them as water colors, so I went ahead and filled in those areas by hand with my yellow Infusible Ink Marker.Notice the muddy colors—but they’ll look completely different when we’re done!

I took a piece of the Cricut Heat Resistant tape and put it down near my project on a piece of paper. I used the blue Infusible Ink marker to bleed out some of the ink onto the plastic tape.

After generously dipping my paintbrush into water, I picked up a little bit of the ink from the tape and then applied it to the wave area of the outline on my paper.

You can layer up this color a little, but you are dealing with thin copy paper and not a paper 100% meant for watercolor. It’s enough you can get fun blotches and shading in your piece, though!

I used a little green for the bottom of the logo with some light shading towards the bottom. Let your paint and color project dry COMPLETELY before you press it to your t-shirt. This is a good time for the rest of the prep work while you let it dry.
Setting up your Cricut Infusible Ink for Transfer
You’re going to have five layers of material by the time you’re done with this, but it’s all important. Turn on your Cricut EasyPress to 385 degrees. I use the small-size press for a pocket-size print. (I love the bag to store it so much more than I thought I would.)

Put your EasyPress mat down on your work surface. Lay a sheet of thick white cardstock on top of it to protect the mat.

Place the mat with the cardstock on top inside the t-shirt.
Thoroughly lint roll the t-shirt area where you will be placing your image.
This seems silly but here is the reason why you want to do this: when you heat the ink up with the EasyPress, the inks turns into a gas and resettles into the fibers of your shirt. If there are lint balls or dirt or anything else on the t-shirt that is going to fall off with washing, your ink is going to go right along with it. No lint balls or debris means your image is going on your shirt just the way you want.

Place the butcher paper over your t-shirt. Press for 15 second at 385 degrees to make sure all errant creases and wrinkles are out of your fabric. Let cool completely. Next we add the pictures to our t-shirt!

How to Press an Image with Cricut Infusible Ink Pens
Here is where all the (literal) magic happens! We’re finally going to put all that hard work coloring and painting on to a shirt. Cut a few pieces of your Cricut Heat Resistant tape. Place the watercolored image onto the t-shirt face down where you want the image to be. Usually, three finger widths under the neckline is where your image should be placed. Use the tape to secure the paper to the shirt.

Place the butcher paper over the image, then press for 40 seconds at 385 degrees. Very carefully lift the EasyPress 2, being sure not to jostle your stack of papers. Let cool COMPLETELY.

Once the t-shirt is cool, remove the butcher paper and watercolor transfer sheet.

Place your black outline image over the watercolor and tape down. If you want, you can slip your BrightPad under the shirt to see that everything is correctly lined up. (Just be sure to remove it before using the EasyPress!)

Put the butcher paper over the image, then press for 40 seconds at 385 degrees. Carefully lift the EasyPress, being sure not to jostle your stack of papers. Let cool COMPLETELY.

Once cool, remove all the papers. Your shirt is complete!
Recommended Products
As an Amazon Associate and member of other affiliate programs, I earn from qualifying purchases.


Things to know about Cricut Infusible Ink and other FAQs to Avoid Mistakes

The blue was light, and the orange and hot pink very dirty looking before adding heat.
- The raw color of the pen or Infusible Ink transfer paper is not the color that said Infusible Ink will turn out as once pressed. Be sure to look at the packaging to see what color is REALLY going to turn up!
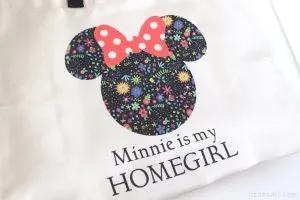
- EVEN PRESSURE with your Cricut EasyPress is VERY important to getting the image to transfer correctly. As is letting the paper and material cool! On this “Florida Girl” tote I made, I didn’t do either. See the shadowing? Not ideal.
- While it is completely possible to 100% line up the transfer paper to do a second pressing, I don’t advise it. Things ended up shifting by a millimeter no matter how careful I was and I ended up with a shadow in my pressed image. Follow the directions. Get it right the first time. Best way to work with Infusible Ink on t-shirts.

- Use all the protective cardstock and butcher papers! And don’t reuse the butcher paper! Here’s an example why. I used the same piece twice when experimenting, and there was a shadow of the prior project still on the paper. It infused to the new project area! Also, it would really suck to ruin your EasyPress and/or EasyPress mat with rouge Infusible ink. Throwing on a few pieces of paper isn’t hard. Replacing equipment is.
- Be sure to mirror. If you’ve owned a Cricut machine for any length of time, you know the importance of that statement.
Related Ideas


Paula Biggs
Owner at Frog Prince Paperie
- Valentines Day Ideas
- Tips for Successful Holiday Entertaining
- Spartan Warrior DIY Halloween Costume
- How to Train Your Dragon Party Ideas
- How to Throw a Teen Movie Night, Princess Bride Style
- Disney Princess Baby Shower with the Cricut Maker
- Watercolor Fishing Baby Shower
- St. Patrick’s Day Easy Home Decor
Ed Eaglehouse
Sunday 6th of August 2023
First of all, thank you for sharing your process. This was a good project to show some flexibility in how the pens and markers should and can be used. It would help to mention explicitly that your "water color" step had to maintain the mirrored design but, after some thought and a couple readings, I figured that out. I'm an absolute beginner with Cricut and just learning what I don't know. On the subject of papers, I do know a little. The use of butcher paper, a heavy untreated food-safe paper used for wrapping and cooking meat, I assume is to temper the heat to transfer the ink evenly. I know freezer paper or wax paper is not usable because the heat would also melt the wax or plastic coating on it. It you can't find butcher paper, two sheets of baking parchment or copy paper, or a sheet of kraft paper, should work as a functional substitute. Water color paper may work but is probably too heavy to use for an efficient heat transfer process. It is also treated with a water-soluble adhesive (water color medium) that holds the paint onto the paper and roughens the surface to grab paint better. All considered, I thought this was a great tutorial.
Paula
Sunday 6th of August 2023
@Ed Eaglehouse, thanks for the feedback! Yes, everything you put on an "Iron-on" has to be mirrored. Apologies if I didn't make that clear. The butcher paper really just keeps the sublimation ink from getting everywhere you don't want it to be, not much to do with the temperature. And you got it right on freezer and wax paper--they've got plastic and would make a MESS. If you try using a different kind of paper, just make sure it's white so you don't get any color transfer. I wouldn't use water color paper for this, you really do need to use copy paper for it to work.
Morgan
Thursday 1st of December 2022
Do you have to use color on a separate piece of paper? Can color marker be applied to the initial black marker outline?
Paula Biggs
Wednesday 8th of February 2023
Yes, you can do the color and the black marker all at the same time, I just found it easier to make sure nothing bled and everything stayed crisp this way!
Watercolor Painting Ideas with Cricut Infusible Ink - Pineapple Paper Co.
Tuesday 27th of August 2019
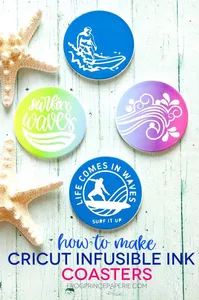
[…] grom) and some coasters for the patio to use while we’re watching the sun set over the water. Continue Reading… Watercolor Coasters with Cricut Infusible Ink by Jennifer MakerHow to use Cricut Infusible Ink pens […]