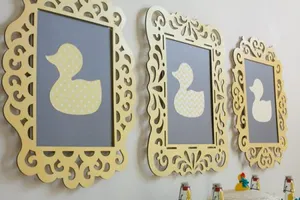
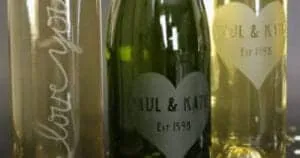
Figuring out the perfect decoration and baby shower favors when you’re throwing a party for someone you love is always a challenge! It’s really the best of all worlds when your decorations can double as the party favors. Like for these Duck Baby Shower DIY personalized wine glasses. This method can be used to put any sort of picture on your wine glasses, but ducks matched our duck baby shower theme (see the rest of the party here.)

These glittery wine glasses stenciled with a duck silhouette to use in the place settings added touch of contrasting bright color. Inexpensive wine glasses can be found everywhere from the dollar store to discount home goods stores, so they’re a good option for favors. Most craft stores will carry the glass paint and stencil film to make your own stencils as well.

how to make duck baby shower diy personalized wine glasses
Materials
- Wine glasses (buy them here)
- Duck outline template (download here)
- Adhesive stencil film (buy it here)
- Glitter glass paint (buy it here)
- Masking Tape

Print the duck templates for the glasses. Cut out one individual duck in a box with a bit of extra white space around the boxes for every wine glass you intend to create. These will be the templates to make the stencils for each glass.
IF YOU HAVE A CRICUT MACHINE: Download this Duck Template SVG file. Duplicate as many images as you need in design space, then cut out your pieces and continue on through the rest of the tutorial.

Cut pieces of adhesive stencil film slightly larger than the template paper.
Tape the stencil film adhesive side down to a cutting mat with masking tape. Tape the duck template over the stencil film. Using an exacto knife, cut the duck shape out of the middle of the box.

Cut the box out.

Remove the backing from the square stencil and carefully adhere it to the glass where you the duck to go. Be sure to make the top line parallel to the lip of the glass. Place the duck cut out in the center of the square.
IF YOU HAVE A CRICUT MACHINE: Use transfer tape to adhere your duck template to your glasses.

Pour a big of the glass glitter paint into a bowl, then brush over the stencil. For full coverage, you’ll need 2-3 coats of paint, drying fully between coats. Patience is a virtue on this one, folks. Actual hands on time for this is not much for this project but there’s nothing quite like sitting around watching paint dry!

After the final coat is dry, carefully peel off the square stencil. Use your exacto knife to lift the edge of the stencil from the surface of the glass if you need to. You’ll have to reference the directions on your particular bottle of glass paint, but anticipate several weeks for the paint to completely cure. Some brands will allow the paint to be cured in the oven in a day, so figure out how much time you have for curing before you buy your paint!
Related Ideas


Paula Biggs
Owner at Frog Prince Paperie
- Valentines Day Ideas
- Tips for Successful Holiday Entertaining
- Large Format Project with Cricut Maker 3
- DIY Jigglypuff Pokemon Halloween Costume
- How to Curve Text in Cricut to Make Monogram Signs
- DIY Hangover Kit
- Minecraft Trunk or Treat Ideas for Halloween Decorating Fun
- Pikachu Ears Pokemon Party Activity
A Modern Duck Baby Shower - Frog Prince Paperie
Monday 9th of April 2018
[…] Personalize and glitter duck wine glasses […]