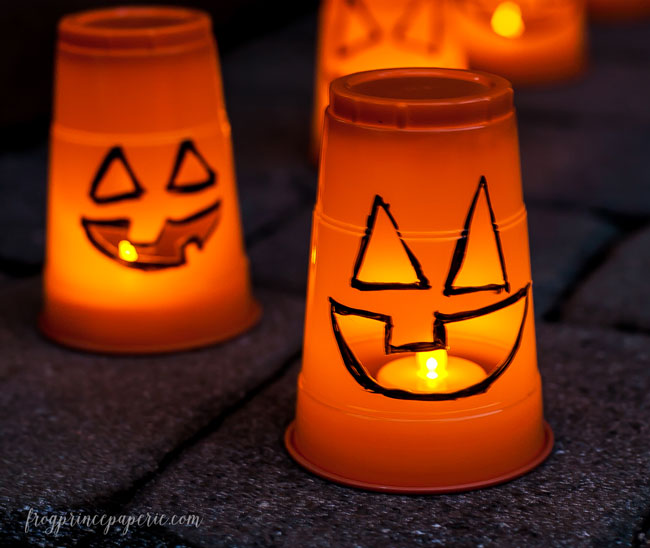
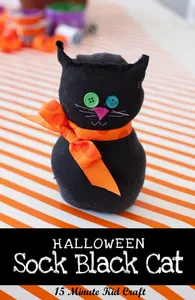
It’s time for Craft Lightning–Halloween style–once again! Last year, I showed you how to make these rediculously easy black sock cats the kids can manage to make on their own. This year, I’m giving details on how to light up your sidewalk for Trick-or-Treaters with a few 3 minute to make DIY Halloween Luminaries.

Orange Solo cups are out there to be had — just probably not at your local box discount store. I picked these up at Hobby Lobby, and I’ve also seen them at places like Party City. If you don’t feel like heading out to the store, there is always Amazon for orange cups. (affiliate link, yo.)
This project will be light years easier and faster to do if you have yourself a hot knife. They’re a handy little tool to have around, and you can hear/see more about them in this post.
Materials:
- Orange Solo cups
- Sharpie marker
- Glass cobochans
- Hot glue gun
- Battery operated tea light

To start your cute little Halloween Luminaries, take your orange cup, turn it upside down and draw lots of fun pumpkin faces on them with your sharpie.

Heat up your hot knife, and cut the faces out of the pumpkins.

While these are cute as is, they are really impractical if there is any sort of wind because they are so light. To solve this little problem and keep them from blowing all around, buy a bag of those flat glass bead looking things (proper name is cobochans) from the dollar store, and hot glue five or six of them around the inside rim of the cup. This should give it enough weight that it won’t shift around on you on account of a little breeze.

Turn on your battery operated tea light, and place your upside down weighted pumpkin cup on top. It’s just that easy. When the sun goes down, these will be the perfect spooky addition to your Halloween decor!
Be sure to check out the rest of the great Halloween Craft Lightning projects by clicking below.

And don’t forget to pin this post for later!

Related Ideas


Paula Biggs
Owner at Frog Prince Paperie
- Valentines Day Ideas
- Tips for Successful Holiday Entertaining
- Transformers Party Game – Making Headbands
- How to Make a DIY Viking Ship Centerpiece – How to Train Your Dragon Party Ideas
- How to Curve Text in Cricut to Make Monogram Signs
- Wine Glass Holder Necklace DIY
- Paw Patrol Party Hat
- {Tutorial} Thanksgiving Turkey Finger Puppets
Mila
Thursday 8th of October 2015
Thank you for linking up last week! Your post has been featured :) https://milaslittlethings.com/2015/10/idea-box-thursday-link-party-31.html xx Mila
Audrey
Sunday 4th of October 2015
I had visions of these flying all over the yard until I saw you weighted them down with the glass cobochans. Love the idea! Thanks for sharing on the #HomeMattersParty . I hope you will join us again next week.
Paula Biggs
Sunday 4th of October 2015
The cups are perfect for lanterns--it was figuring out how to make them stay put that was the hard part! The glass beads work surprisingly well.
Rose Garden Malevik
Saturday 3rd of October 2015
that is a really easy and a clever idea :) You are welcome to join SATURDAY SHOW OFF Hugs from Håkan in Sweden
Lisa/Syncopated Mama
Thursday 1st of October 2015
Pinned & think this idea is so cute! I was also thinking you could use clear cups at Christmastime - my neighborhood growing up always set out white bags filled with sand and candles.
Erlene
Tuesday 29th of September 2015
What a clever idea to use small glass stones on the inside to keep it from toppling over. Will keep that in mind when I make other things for outside.