This October is going to be a little different and having a DIY Halloween Face mask (made with your Cricut or Silhouette) is going to be a must for showing a little, ahem, spirit. I look at it as a great opportunity to be a little creative and way make my face coverings make people smile! You can also think ahead and incorporate your face mask into your overall costume.
Face mask blanks and vinyl
I purchased the masks in this post on Amazon. (affiliate link) They are a cotton-poly blend. But as with all things face mask, use your best judgement and purchase (or make) blanks masks that best suit your family and your family’s comfort levels.
I prefer designs that do not heavily cover the area of the masks directly over the mouth; breathing through three layers is hard enough without adding a layer of plastic. But, that’s my preference!
My personal preference for iron-on vinyl is Cricut’s SportFlex. It’s thin, transfers easily and is very flexible–which is important when it comes to face masks!

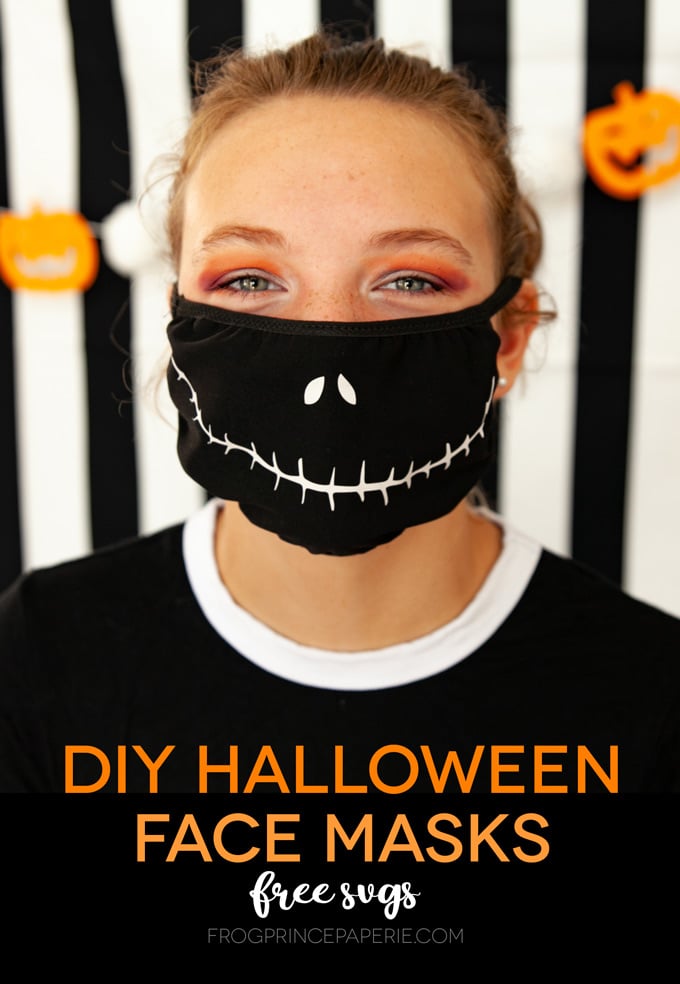
The Jack Skellington Face mask
Nightmare before Christmas has always been a favorite, and every single year I make a pumpkin to look like Jack Skellington. I can’t think of a better grin to put on a Halloween face mask than his!
These are the general directions for creating an iron-on face mask. Follow them for every design.
Materials:- Free Jack Skellington svg file (click to download)
- Face Mask blank
- Cricut SportFlex vinyl
Make your mask!
Upload the svg file to Cricut Design Space or your Silhouette Program. Resize to fit your face mask. I would leave an inch on either end for Jack Skellington’s transfer. My mask is 4×7, so I’m going to make my image 6 inches wide. Cut your vinyl once you’ve resized the image and weed it.

The Cricut Joy is the perfect size to cut a project like this!

Your mask should be mostly stretched out as to make it flat when you iron your image on. I used a piece of scrap cardboard to stretch mine out over for ironing.
I love my EasyPress 2 to bits, it makes projects like this so much simpler to get right. Follow the heating and pressing instructions for your material/vinyl when transferring to your face mask.
If you’re using the Cricut SportFlex vinyl as recommended, you’ll need to let the vinyl cool completely before you peel off the transfer sheet.
 Spider Face Mask
Set the image off to the side of your mask when ironing on.
- Free spider SVG for DIY Halloween Face Mask (click here to download)
 A little batty face mask
This cute little bat also looks great set high and off to the side of the face mask when ironing on. It was sized to two inches in this photo.
- Free bat SVG for DIY Halloween Face Mask (click here to download)

Have fun, be silly, and have a great Halloween, masks and all!
Related Ideas


Paula Biggs
Owner at Frog Prince Paperie
- Valentines Day Ideas
- Tips for Successful Holiday Entertaining
- What is a Cricut and What Does It Do?
- Art Deco Table Numbers Using the Cricut Maker Engraving Tool
- Custom Christmas Shirts for Toddlers and Infants
- American Girl Tea Party Ideas
- First Day of School Free Printable
- Easy DIY Star Wars Costumes