****Free Printables now updated for 2019!! ****

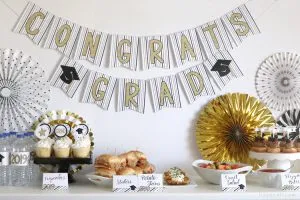
When you’re decorating for a big bash like gradutation, you want pieces that stand out and look great…but you don’t necessarily want them to hang around for a real long time after the party is over. At the beginning of creating this graduation party, I had intended to find some vases to cover and use. By happy chance, I 1. couldn’t find anything that was exactly what I wanted and 2. everything i did find cost more than what I would dream of spending on a piece with such a short lifespan. You know how that saying goes…cheapness and stubborn adherence to vision is the mother of all invention. Or something like that.
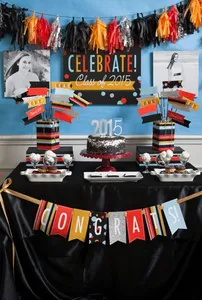
The flag centerpieces inspired by a Shutterfly invitation are big and bold and made from ordinary household objects. In fact, you can pick up most of the components at the dollar store. The parts that you can’t find at the dollar store, you can find right here as free printables. It’ll make putting these together a snap! Be patient with the download; these are bigger files. After you enter your email address, you’ll be instantly emailed a link where you can dowload the files to create the centerpieces, updated for 2019!
And before I give the tutorial to make these most awesome graduation centerpieces, a montage to show you how fabulous and awesome and all that other humble stuff they are. *Affiliate links ahead.


To create celebratory graduation centerpieces of your own, gather your materials and get down with your bad self and your exacto-knife.
Materials:
- Foam core – any color, but at least 18 inches wide
- Packing Tape (buy it here)
- Scrapbook paper and flag free printables (posted above!)
- Foam block (buy it here)
- Bamboo skewers (buy them here)
- Black sharpie (buy it here)
- Hot glue
- Silver packing shred (buy it here)
- Ribbon (optional)
- Silver glitter card stock (optional)

Step 1. Make your boxes. Making your own boxes is what makes these centerpieces so insanely affordable and will ease the guilt when they hit the trash after the party.
Cut a piece of foam core to 7 inches high by 18 inches wide. Score slits in the foam core at 5 inches, 4 inches, and 5 inches as shown in the photo above. Don’t cut all the way through, you’re just making guidelines for yourself for the next step.
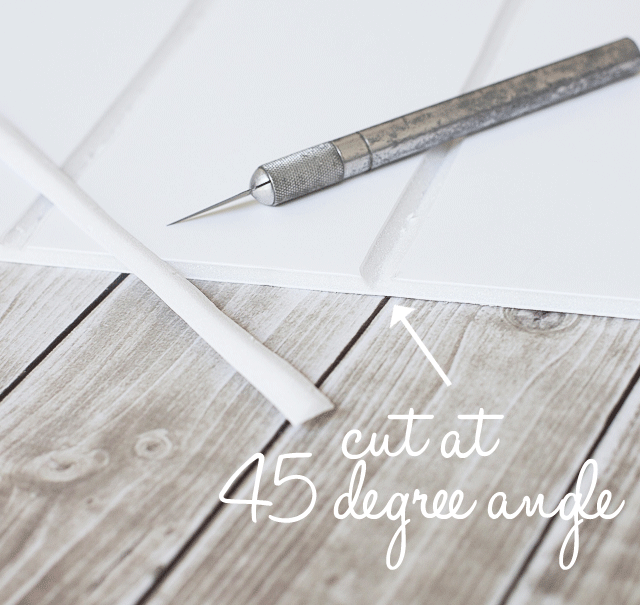
At each guideline, cut a 45 degree angle on each side towards the guide, still not cutting all the way through the foam core. You should be able to pop out the triangular piece when you’re done. This will form the inside edge of the box once we finish. Make sure you cut the ends as well, as they’ll have to piece together, too!

Fold the box up at the joints, and tape the corners together. I like to use packing tape for this.

Cut a piece of foam to fit inside the box. I like to use the block kind; this particular one was one inch thick. Just trace the inside of your box onto the foam and cut. It was a bit of overkill, but I maniacally took out my butcher knife and used it to chop up the foam into itty bitty pieces. Crafting is therapeutic, what can I say? If your foam doesn’t fit tight enough to stay put in the box, run a bead of hot glue around the edges to make it stick in the box.

Wrap it up. Take two sheets of the striped paper and tape them together from behind so they make one big piece of paper. Cut off all the white stuff if your printer doesn’t print to the bleed. (That means all the way to the edge.) Be sure to line up the stripes when you tape the sheets together!

Now we’re going to wrap the box up. This is easy-peasy. That natural bend the taped together paper is going to make should be laid against one of the box corners so it makes a nice sharp corner (and is less obvious). Make sure the bottom of the paper and the box are flush, and the extra paper sticks up over the top. I run a bead of hot glue on the box to adhere the paper. Once you have a point secure, just keep wrapping your paper around the box.

There will be a little bit of paper sticking up off the top of your box when you’re done. This works out well; cut a slit in the paper at each corner and fold it down to the inside and glue. It’ll give your final product a much more finished look!

Print out a few copies of the free graduation flag printables. Cut them out in strips. If you choose to, use your black sharpie marker to color your bamboo sticks black.

Gently fold the strip in half, and glue. Don’t fold entirely closed at the folded end–you’ll need that open to put the stick in later!

When the glue has set, trim a notch in the end of your flag.

Put a dot of hot glue in the opening to the flag, and push the end of a bamboo skewer through the glue into the hole. This will well-set the stick in the flag.

Make as many as you want for your centerpiece! You can even make silver sparkly flags using silver glitter paper; just cut to the dimensions of your other flags!
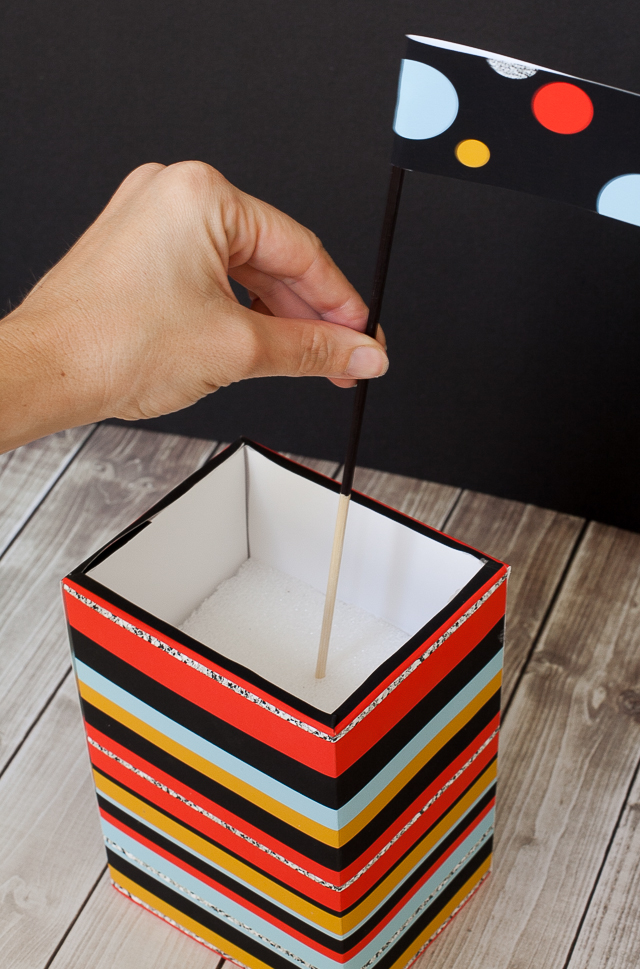
After you’ve got all the flags you see necessary for your centerpiece, arrange them in your box. The foam will conveniently keep them in place for you!

After you’re finished placing the flags, cover the top of your box with silver shred. You have the option of wrapping ribbon around your box as well.
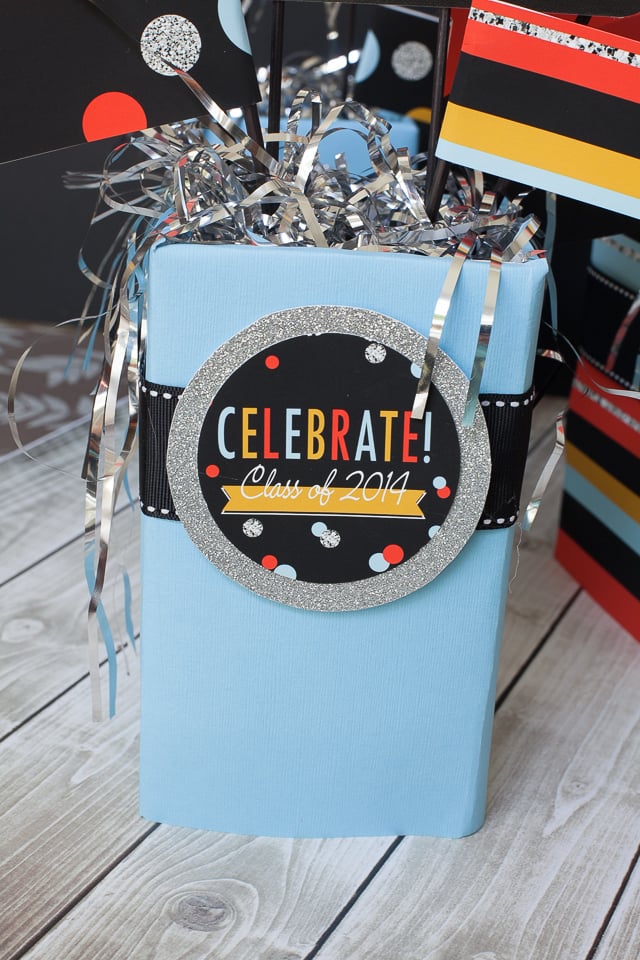
You can use the graduation 2 inch printables to make a pretty medallion for the front of your box. Don’t dig the striped paper? Use plain card stock instead. There are lots of ways to personalize this and make it your own! I even used a few leftover invitations to make rectangular signs to stick in the top of the boxes.
Go crazy with these DIY graduation centerpieces! They’re inexpensive, impressive, and you don’t need to hang on to them after the party’s over.
Related Ideas


Paula Biggs
Owner at Frog Prince Paperie
- How to use AI to plan a Scavenger Hunt for Teenagers
- Valentines Day Ideas
- DIY Pikachu Costume for a Pokemon Halloween with Cricut
- How to Make Tissue Paper Pineapple Pouf & Flamingo [Luau DIY]
- Chaos Coordinator Shirt and other Mom Shirt Ideas
- American Girl Tea Party Ideas
- Backyard Movie Party Ideas
- Pikachu Ears Pokemon Party Activity
Vicki Tyler
Thursday 22nd of April 2021
Will you have an update for 2021 graduates? Thank you . Love this!
Vicki
Tuesday 24th of April 2018
Will you be updating for 2018?
DIY Graduation Party Ideas - A Little Craft In Your Day
Thursday 8th of March 2018
[…] 8.Graduation Party Centerpiece […]
Tamara
Saturday 26th of August 2017
Hi! Will there be an update for 2018 graduates? I love this tutorial.
Paula Biggs
Tuesday 29th of August 2017
There will, Tamara. Probably not until 2018, though!
Jennifer Porras
Tuesday 11th of April 2017
Hello! So easy to make and very budget friendly! Would you consider updating to 2017?
Paula Biggs
Thursday 13th of April 2017
Done! :)